OneSignal
In this section you will learn:
- How to connect OneSignal Web Push notifications to your website.
- How to configure the transfer of segments in OneSignal.
OneSignal is a system for sending cross-browser and cross-platform push notifications. OneSignal is able to create audiences based on the events on the site and send browser-based pushes to this audience. SegmentStream allows you to send data about the behavior of your users to OneSignal.
Page contents
Introduction
Using SegmentStream, you can fully integrate OneSignal with your site.
OneSignal Documentation
We recommend that you first fully transfer your site to https. In this case, the process of subscribing to push notifications for your users will be easier.
Before configuring the integration in the SegmentStream interface you need to install 3 files to the root of your site.
For details, see the OneSignal documentation
To configure the OneSignal integration:
- Log in on the segmentstream.com website and go to the integration management panel
- Click on the “Integration” tab and click on the block with the OneSignal logo.
- In the panel that opens, configure the integration.
You can read more details about the settings below.
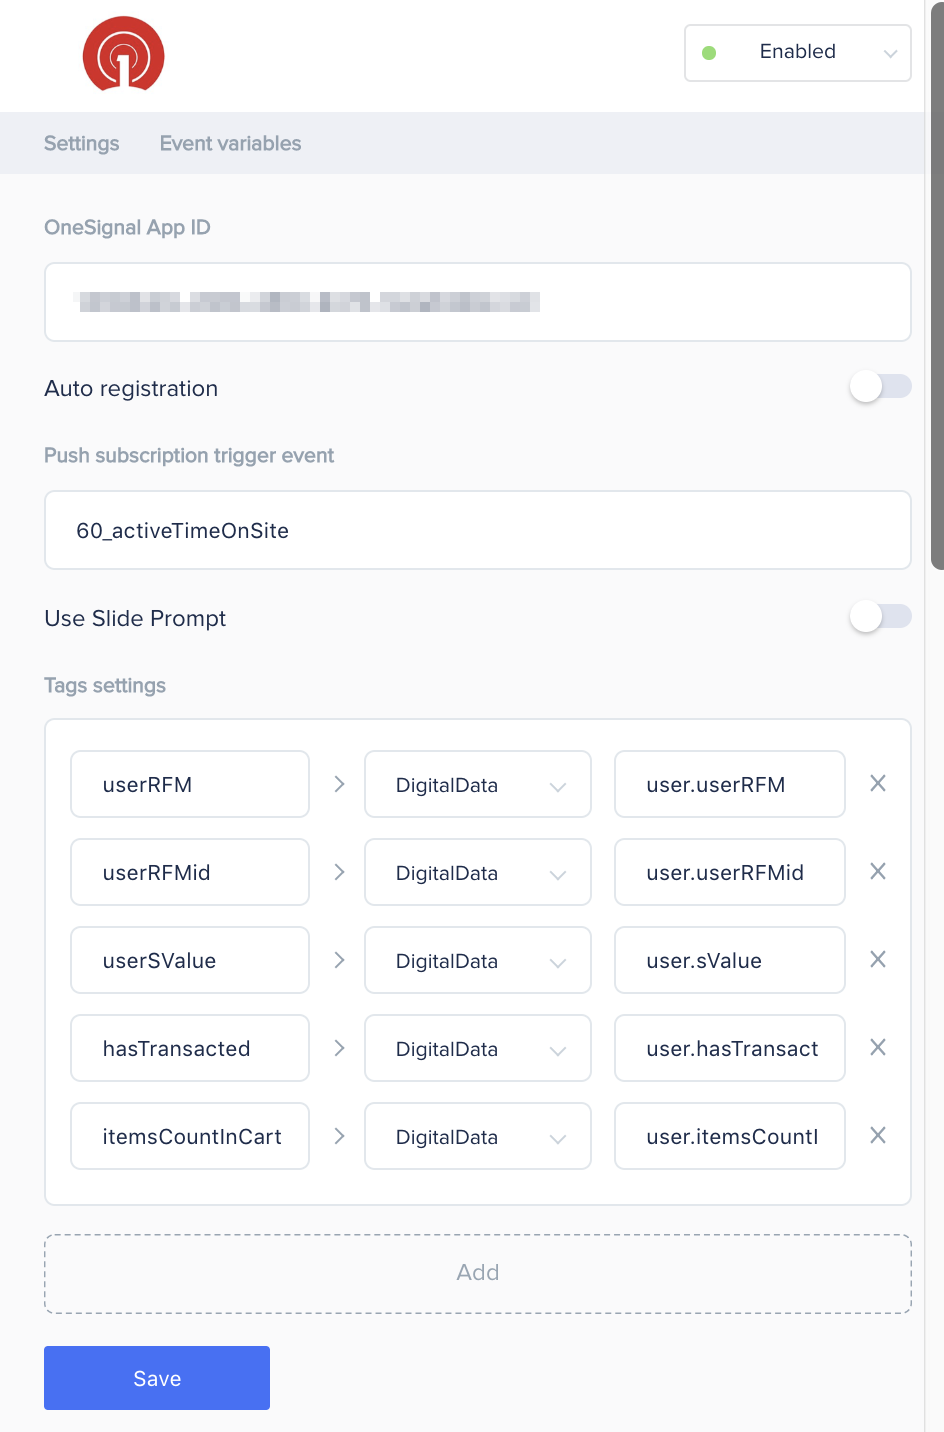
OneSignal App ID
You can find the App ID in the OneSignal interface.

Copy the ID and paste it into the “OneSignal App ID” field of the integration settings window.
Automatic registration
If you enable this toggle switch, the subscription window will appear immediately after the first page of your site is loaded.
We do not recommend using this method of collecting subscriptions.
Push subscription trigger event
In order for the user to receive push notifications, he must first subscribe. The subscription form depends only on the version of the browser, you can not change it in any way. You can only control the moment the form appears in the user’s browser.
SegmentStream allows you to control the moment the subscription window is displayed. To specify this point, specify the name of the event in the corresponding field. After this event occurs (it will be pushed to the digitalData.events array), a standard window for subscribing to push notifications will be displayed.
Use Slide Prompt
If you enable this toggle switch, a stylized OneSignal popup will appear instead of the system subscription window.
This option only works if the ‘Custom Code’ setup was selected in the OneSignal cabinet. When using this option without the ‘Custom Code’ setup, the configurations setup inside the OneSignal cabinet will be overwritten.
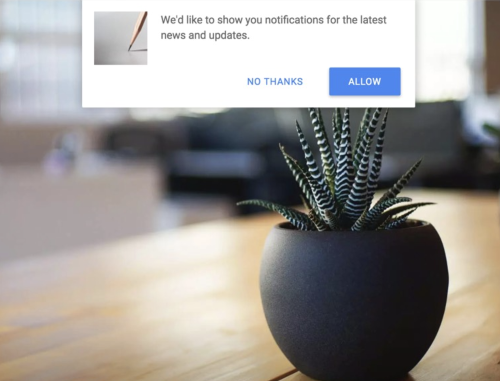
Slide Prompt Options
When you turn on the “Use Slide Prompt” toggle switch, the OneSignal pop-up window apears with the standart text, as shown in the screenshot above.
You can customize this text using the Slide Prompt Options. The text configuration is divided into 3 parts:
- Slide Prompt action message (maximum length 90 characters)
- Slide Prompt accept button text (maximum length 15 characters)
- Slide Prompt cancel button text (maximum length 15 characters)
Blank fields are displayed with the standard text.
Configuration example and the result:

Tag settings
OneSignal provides ample opportunities for building trigger communications. For example, you can configure the sending of push notifications to those users who put the goods in the basket and left (the abandoned basket). For this, the system must know the composition of the basket each time the page is loaded.
SegmentStream can send any information from the digitalData object along with any events.
To configure the transfer of variables, fill in 3 fields:
- Left - the name of the tag that you want to use in OneSignal
- Center - set
digitalData, if the variable is present in the object, oreventif the variable only appears in certain objects. - Right - path to the variable inside
digitalDataoreventobject.
See the first screenshot for an example.
Tracking system popup events
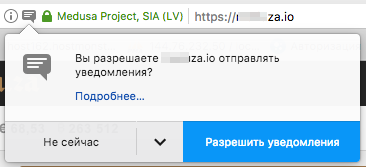
OneSignal gives you the option to subscribe to the events of interaction with the push notifications subscription system. There are 3 ways to interact:
- Click on “Allow” - “Allowed Push Notifications”
- Click on “Block” - “Blocked Push Notifications”
- Click on the close button - “Closed Push Notifications Prompt”
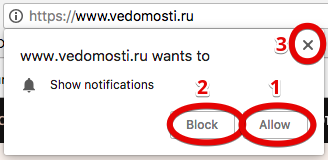
After the user completes one of the 3 possible actions, the corresponding event will automatically be pushed to the digitalData.events array:
- Click on the “Allow” button
digitalData.events.push({ category: 'Push Notifications', name: 'Allowed Push Notifications' }) - Click on the “Block” button
digitalData.events.push({ category: 'Push Notifications', name: 'Blocked Push Notifications' }) - Click on the “Close” button
digitalData.events.push({
  category: 'Push Notifications',
  name: 'Closed Push Notifications Prompt'
})