Admin panel: Integrations
Each integration is a connector between digitalData and a third-party system. An integration can listen to all events added to the array digitalData.events, and also convert events into a format required for a third-party system. If an event is necessary for a system, SegmentStream sends it.
Page contents
Introduction
For integrations to work, you will need to configure the addition of semantic events to the digitalData.events array: Viewed Product Detail, Clicked Product, Added Product, Completed Transaction, and others. Each integration uses its own set of events. The complete list of reserved events is described in the documentation.
The integration management interface contains 2 tabs:
- Settings. Each integration has a set of settings. For some integrations, this is only a unique identifier in a third-party system, for others - a fairly long list. You will find the description of the settings of all integrations on the corresponding pages.
- Event variables. Each event contains a set of variables. It is sometimes necessary that, depending on certain conditions, variables must take non-standard values. For example, you can use different product feeds with different product identifiers for each region of Europe. In this case, it is necessary to redefine
product.idon the fly.
The typical process for connecting any integration is described below.
Setup
On the “Integration” screen, select the system that you want to connect and click on the card of this system.
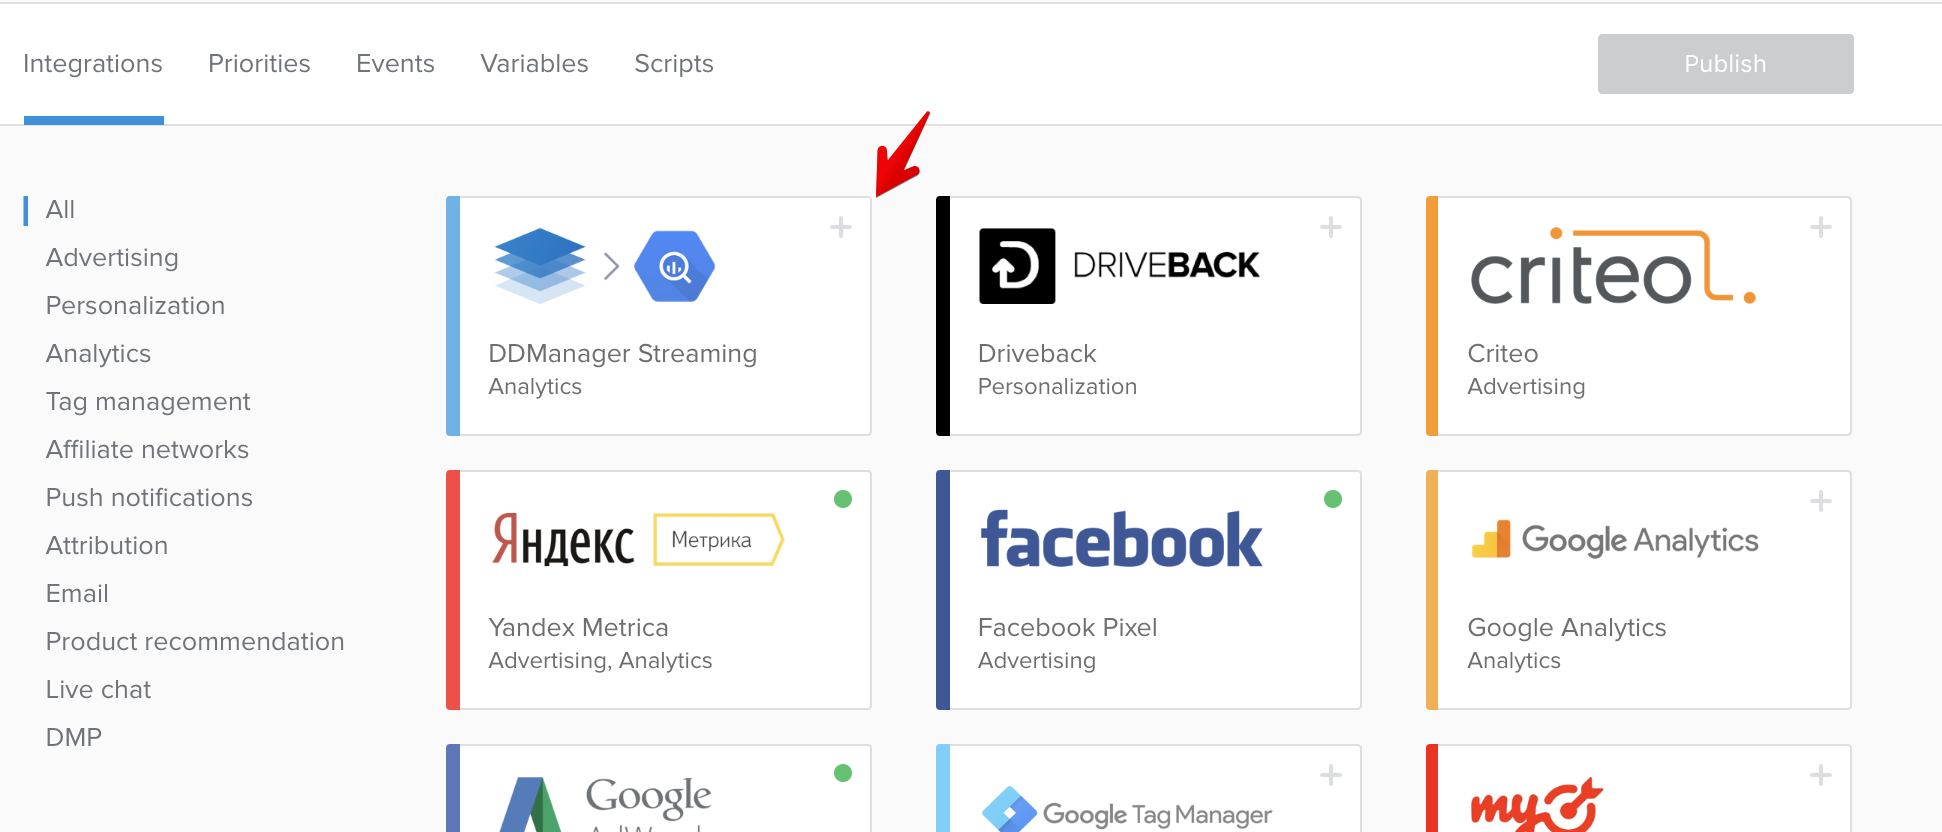
The green indicator on the integration card indicates its active state.
You can set up the integration inside the panel. Read more about each integration in the appropriate section of the documentation.
Event variables
Let’s take a look at an example of the product identifier override depending on the region of the user on a Google Adwords integration.
- Click the “Event Variables” tab and click “Add”
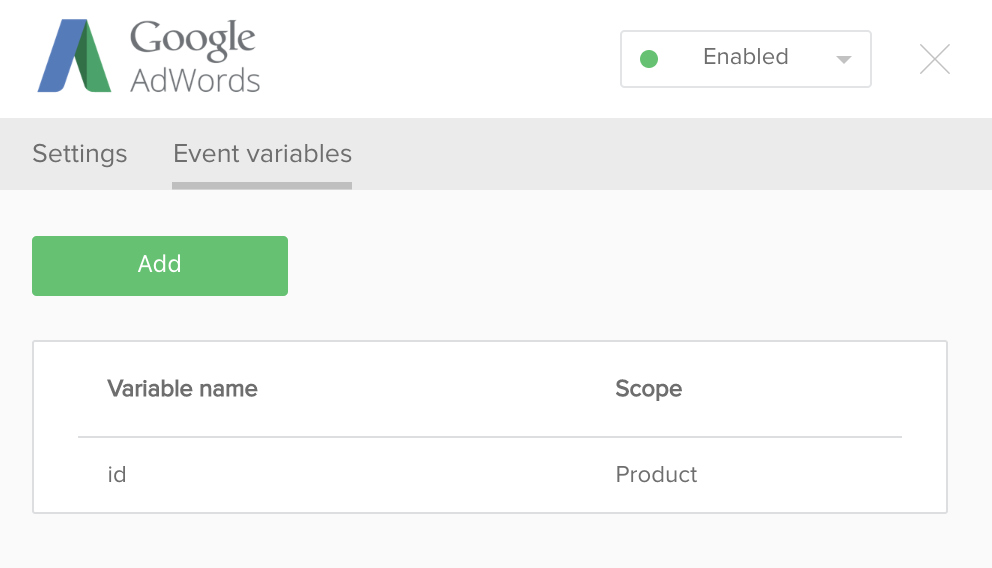
- In the window that opens, fill in the fields: Scope, Variable name, Event handler.
- In the “Scope” field, you must specify the scope where you want to change the value, if you select “Event”, then the variable name specified in the input below will only be modified on a particular event, if you select “Product”, then all instances of the product object will have the specified variable overwritten. Since we need to have the same product identifier for the whole integration, we select
product. - In the “Variable name” field, you must specify the variable whose value you want to change. Since the Google Adwords integration gets data from
digitalData.events[].product.idwhen a product page is viewed, it is necessary to specifyidin the configuration field. - If we would have selected
eventon step 2, the “Event name” field would be present, here you must specify the name of the event whose variables will be overwritten “on the fly”. If you do not specify any name, the overwrite will work for all events in which the variable specified in the “Variable Name” field occurs. - The event handler must return a value (contain the return construct). The value returned by this function will be placed in the variable specified in the “Variable Name” field of the selected scope when any event occurs.
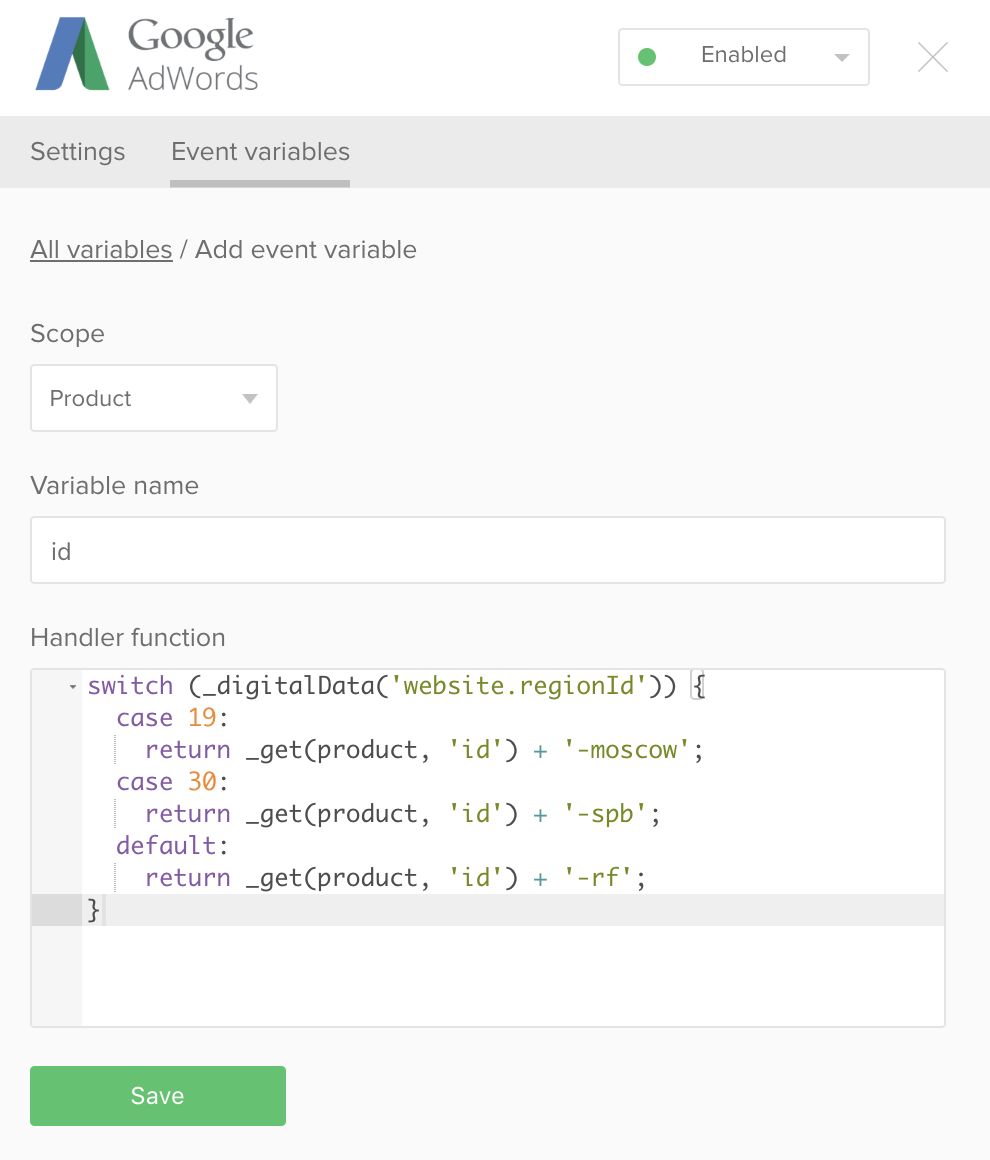
As you can see in the example, the variable product.id takes a different value depending on the region of the user. For users from Moscow, the suffix “-moscow” is added to the value of the field digitalData.product.id.
If before in Google Adwords the following value of the productId variable would have passed: “3856”, then after the change, the value will be “3856003-moscow”.
- ‘3856’ - is the product identifier, it has the same value for all variations of this product
- ‘3856003’ - is the skuCode, it has a different values for each variation of this product. For example, for sneakers of a certain color and size 40, the value will be ‘3856001’, for the same sneakers of size 41 - ‘3856002’.
- ‘3856003-moscow’ - is the value of the product identifier, as marked in the XML-feed sent to Google Adwords for the ‘Moscow’ region.
Testing
Testing is necessary after setting up an integration. This can be done in test_mode mode.
To activate test_mode you should load any page of your website with the
?segmentstream_test_mode=1GET-parameter, for example: http://demo.segmentstream.com/?segmentstream_test_mode=1.Once test_mode is activated, an icon will appear on the bottom-right of the website. To disable test_mode, click on the power button as shown in the picture, and reload the page.
If the version of the snippet on your site is less than2.0.0, then instead of?segmentstream_test_mode=1,?ddm_test_mode=1must be used.
Open the console (right mouse button -> View page code). In the console, you will see a sequence of events sent to the connected integrations. Along with the events, you will see all the variables that are sent in each integration. There are 3 indicators:
- If everything is set up correctly, all variables under the integration will be written in green
- Variables with non-critical errors will be orange
- Variables with critical errors will be red and marked with a
x>symbol, which means that the event wasn’t sent to the integration
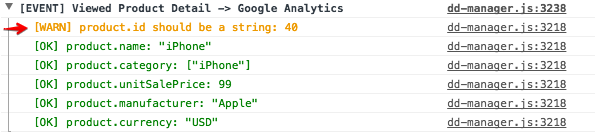

If there is an error, pay attention to the line indicating the error. The most common mistake is that you do not pass the variable you need to integrate into digitalData when loading the page.
Publication
After you test the integration in test_mode mode, you can publish the project. To do this, click the “Publish” button at the top right of the page.
Other body
This document was last updated on June 5, 2013. If you notice any gaps, outdated information or simply want to leave some feedback to help us improve our documentation, please let us know!