Admin panel: Events
Events is one of the most important components of digitalData. All information is sent to analytics and marketing systems in the form of events. Below, you will find a detailed description on how to create and manage events in the SegmentStream interface.
Page contents
Introduction
Any event is a set of information that enters the digitalData.events data array. The information in the array must be represented as a javaScript object. For example: SegmentStream will register an event with the name “Some Event” when the following code is executed:
digitalData.events.push({
  name: 'Some Event',
  value: 3000
});
Now SegmentStream can send information about the event “Some Event” with the value 3000 to any system, for example, Google Analytics and Yandex Metrika.
Event creation
SegmentStream has 8 basic triggers:
Important! The default SegmentStream client library always sends a built-in Viewed Page event after loading. This event can be disabled by turning off the Automatic sending of the Viewed Page event option in the project settings.
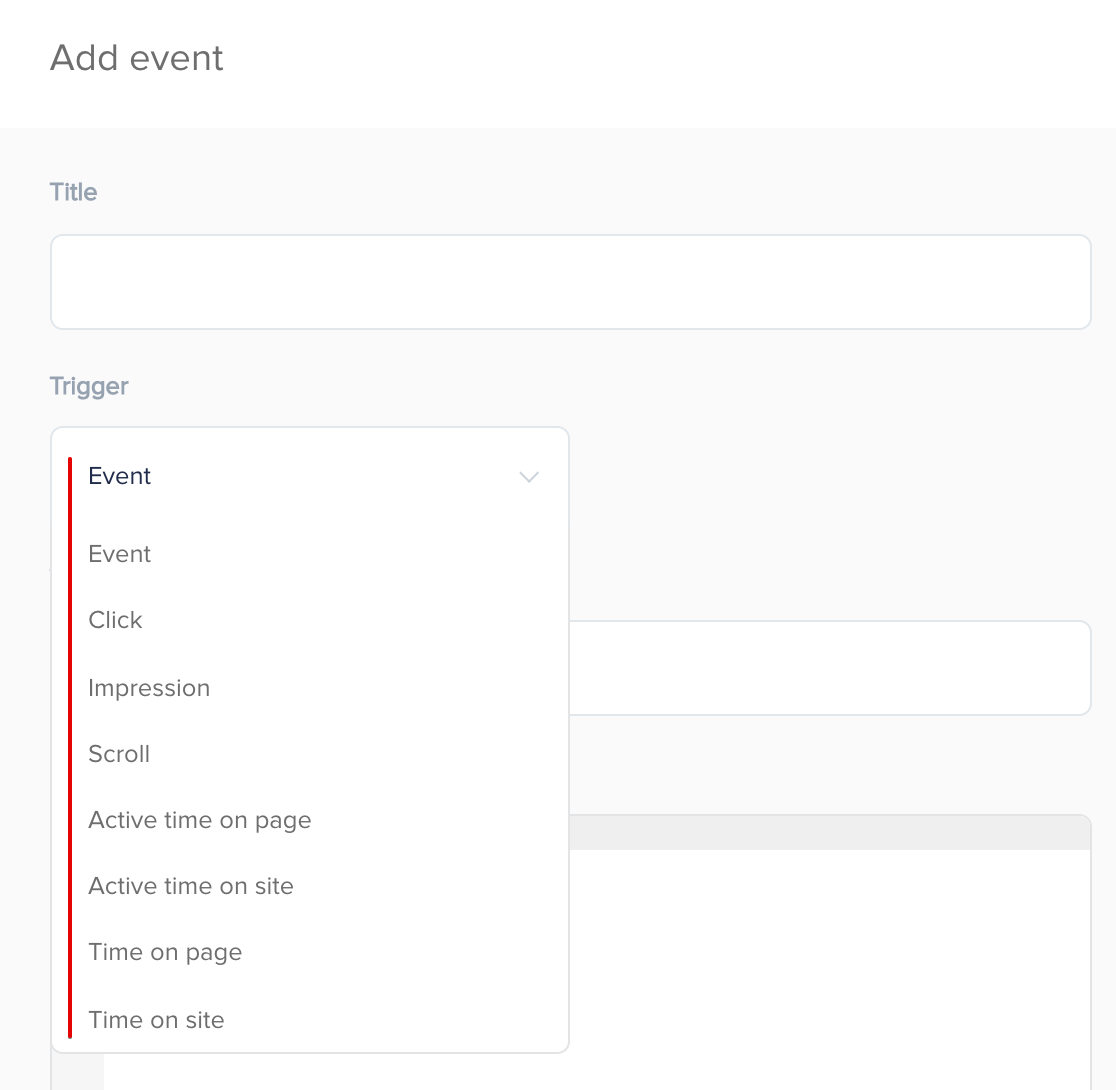
Based on these triggers and data from digitalData, you can create new events.
Example 1: Viewed Product Detail Event
Most marketing systems require information about your online store’s product page views. To send the information about the viewed product to any integration, you need to configure the Viewed Product Detail event. This event occurs when the user loads a product page, or in the digitalData language: The Viewed Page event has occurred while the variable digitalData.page.type is equal to ‘product’ (the type of page on which the user is located is a product page).
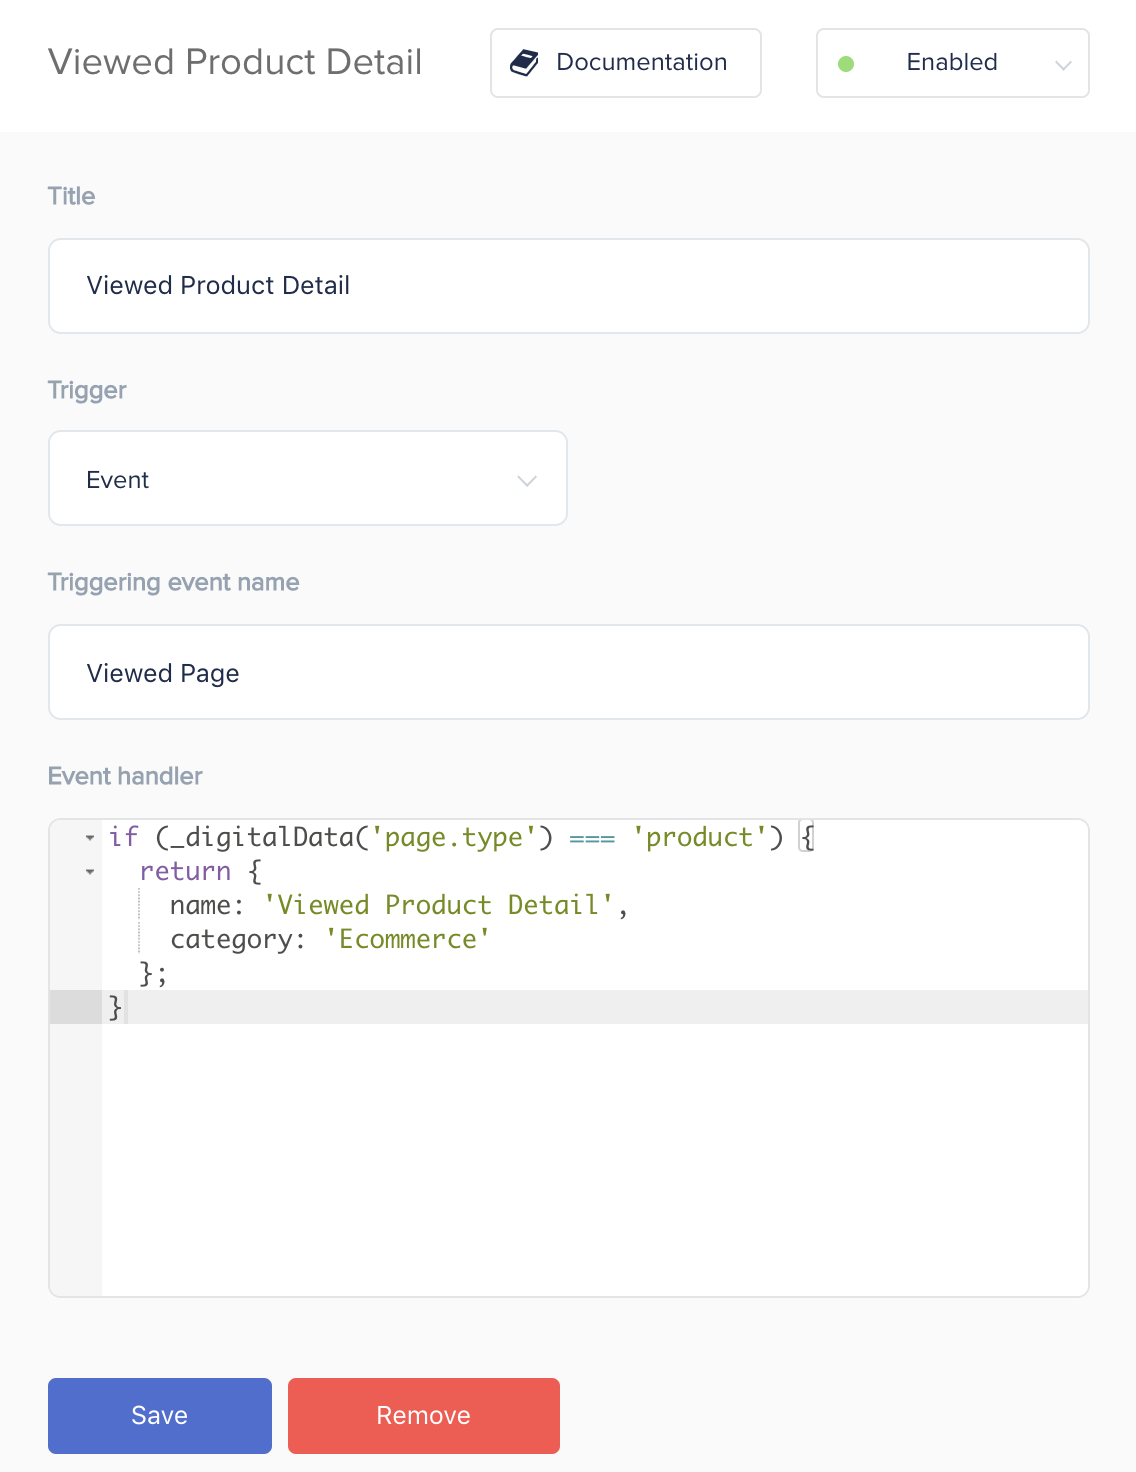
if (_digitalData('page.type') === 'product') {
  return {
    category: 'Ecommerce',
    name: 'Viewed Product Detail'
  };
}
The code _digitalData(‘page.type’) is explained in the helper functions section.
Example 2: Clicked Campaign Event
For tracking CTR and other indicators of the effectiveness of internal campaigns, you need to track clicks on banners. This event occurs when the user clicks on a banner or in the digitalData language: The Click trigger fires on the page element that contains the CSS class = “ddl_campaign_link”.
Important! If you selected “Click” as the trigger in the campaign setup, in the “Function that returns an event object” field, you can refer to the “element” variable. Element is the DOM object whose CSS selector you specified.
Please note! When the “Click” trigger is selected an additional “Follow link defined in “href” after event” option appears. Enabling it will add a 500ms delay between the click on the link and the redirect, so that the tracked event has enough time to be sent to all integrations.
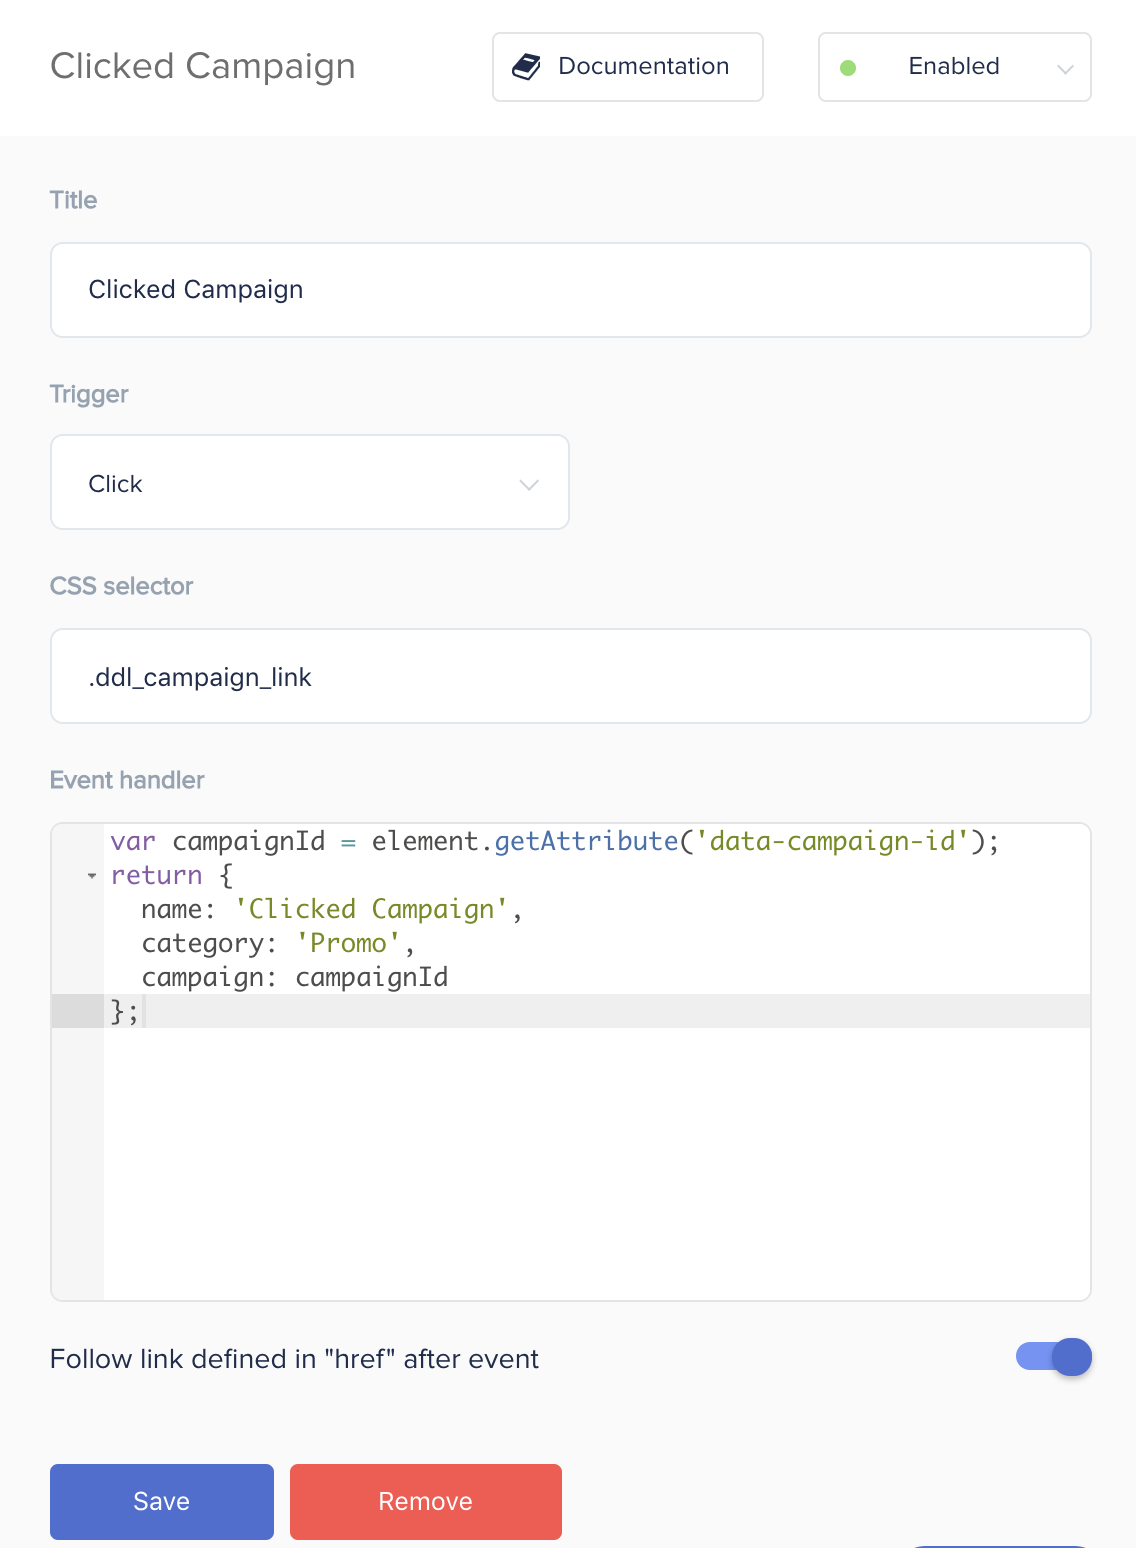
var campaignId = element.getAttribute('data-campaign-id');
return {
  name: 'Clicked Campaign',
  category: 'Promo',
  campaign: campaignId
};
Example 3: Viewed Campaign Event
In conjunction with clicks on banners, you need to track banner impressions. The built-in “Impression” trigger works only when 75% of the monitored page element is in the site visitor’s browser field of view. The CSS selector for the tracked element is specified in the corresponding event setting field.
Important! If you selected “Impression” as the trigger in the campaign setup, in the “Function that returns an event object” field, you can refer to the “elements” variable. Elements is an array of DOM objects whose CSS selector you specified.
var viewedCampaigns = [];
for (var i = 0; i < elements.length; i++) {
  var campaignId = elements[i].getAttribute('data-campaign-id');
  viewedCampaigns.push(campaignId);
}
return {
  name: 'Viewed Campaign',
  category: 'Promo',
  campaigns: viewedCampaigns
};
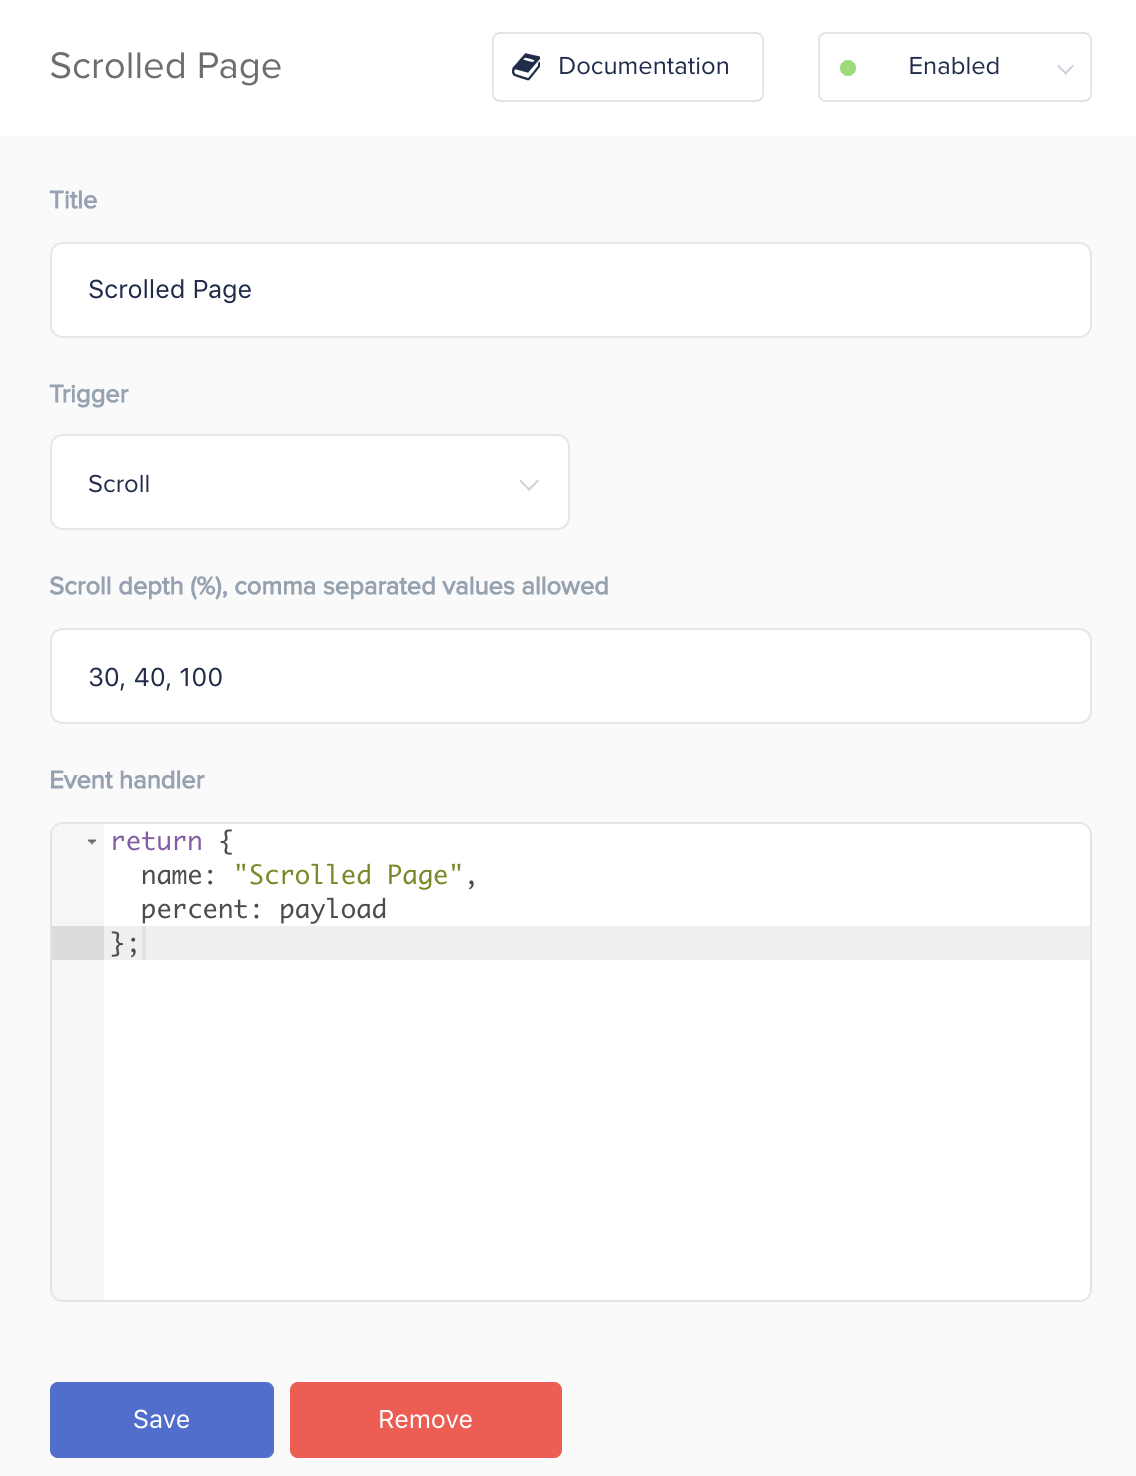
Example 4: Scrolled Page Event
A custom event checking how much of the page has been scrolled through. It can be triggered once per page, for each of the set comma separated scroll depths is reached. The example below shows how to track when 30, 40, and 100 percent of a page’s length has been scrolled through.
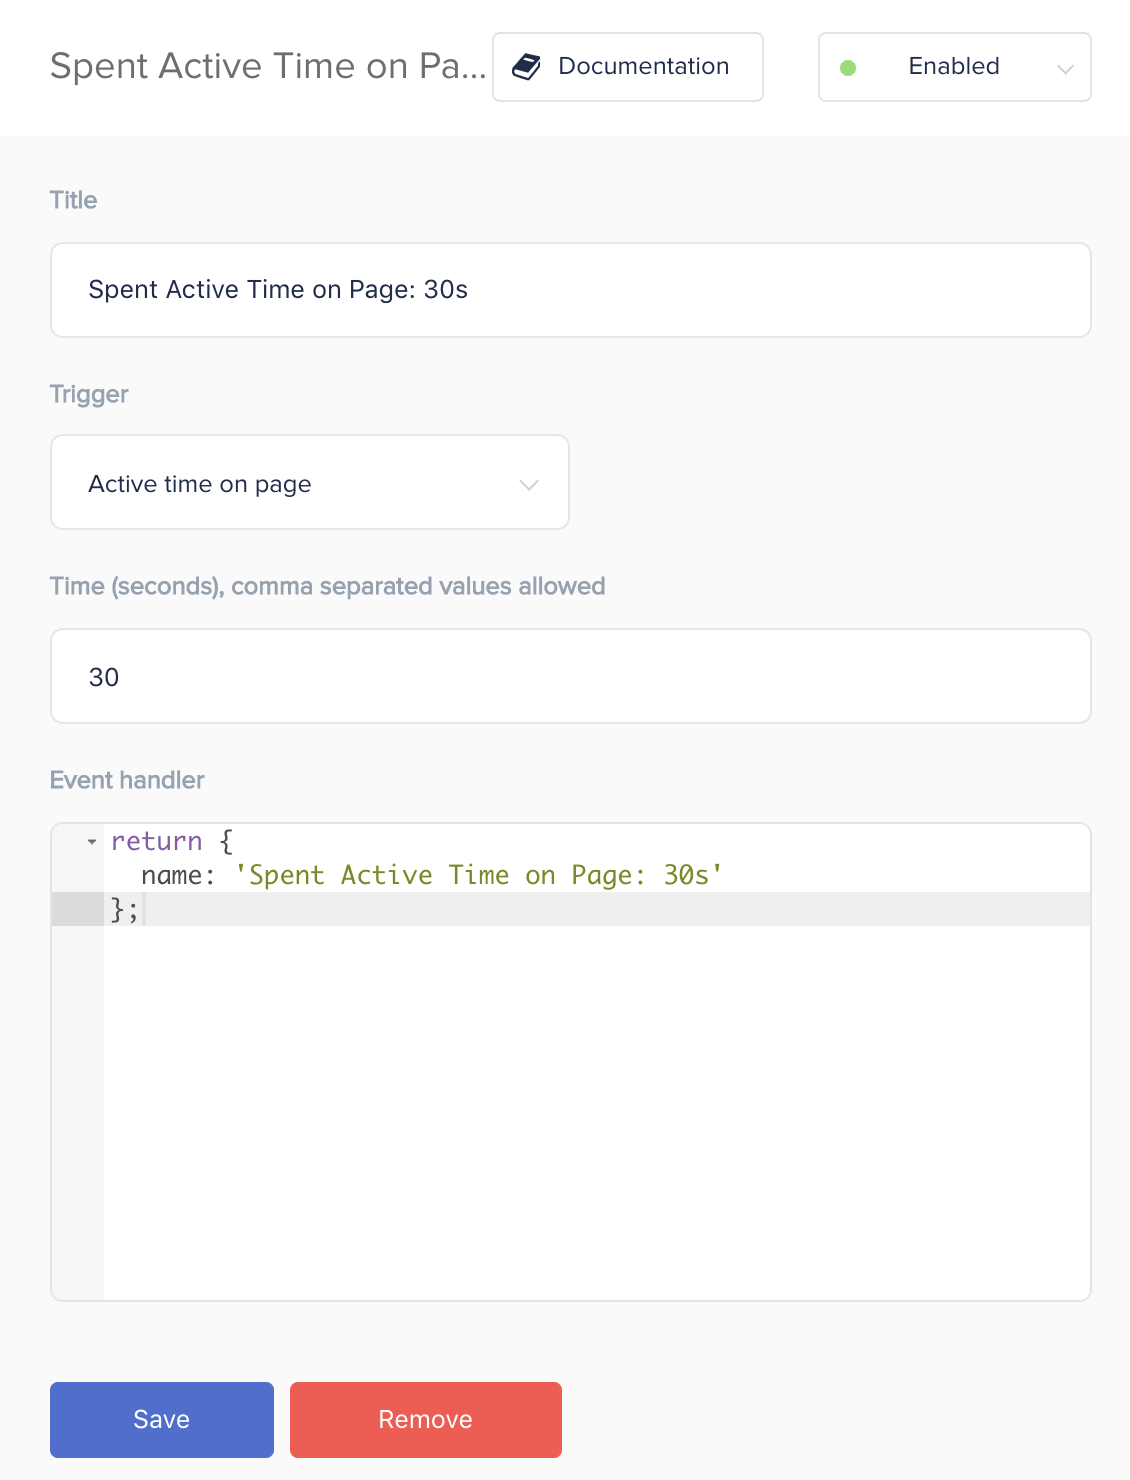
Example 5: Spent Active Time on Page: 30s Event
A custom event checking how much active time has been spent on the page. The example below shows how to track when 30 active seconds have been spent on the page. Changing the ‘Trigger’ input to ‘Active time on site’ will track all the active time in the visitors session.
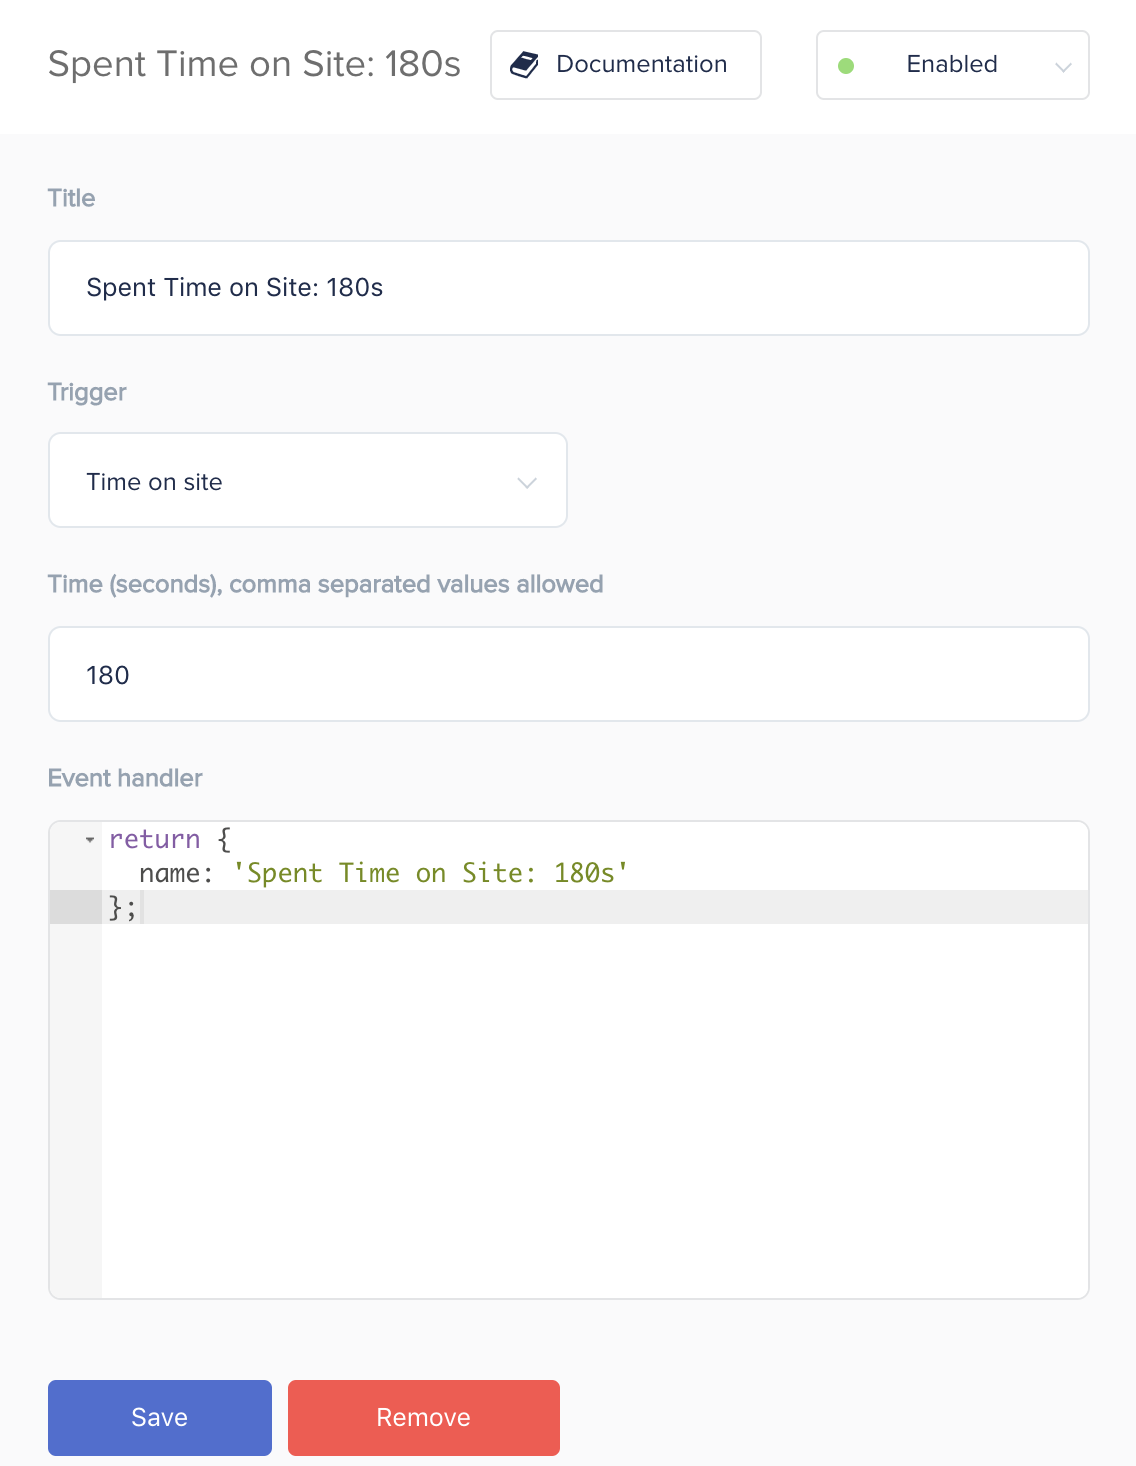
Example 6: Spent Time on Site: 180s Event
A custom event checking how much time has been spent on the website. The example below shows how to track when 3 minutes have been spent on the website. Changing the ‘Trigger’ input to ‘Time on page’ will track the time spent on a page.
Event naming convention
Standard SegmentStream integrations work with a list of reserved events, for example: Viewed Product Detail, Viewed Checkout Step, Completed Transaction, etc. The complete list of reserved events is located in the side menu under “Events List”. Use the event names listed in this list.
If you need to add an event that is not in the reserved list - use our event naming convention.
Other body
This document was last updated on June 5, 2013. If you notice any gaps, outdated information or simply want to leave some feedback to help us improve our documentation, please let us know!