Admin panel: Variables
The “Variables” module allows you to create new data based on the data in the digitalData object. This module solves a wide range of tasks: from converting one data format to another, to creating a new variables in digitalData based on data received from third-party systems.
Page contents
Introduction
SegmentStream allows you to send data from the digitalData object to any marketing system, for example, send information that the user has already made purchases into Criteo. Criteo only accepts numeric segment values, so you have to convert the purchase information to a numeric form. You can ask your programmers to send a value of 1 to the variable digitalData.user.criteoSegment every time a page loads, but it’s easier to create this variable in the SegmentStream interface.
To create a new variable, click the “Add” button ontop of the list of all the variables. To edit previously created variables - click on the name of the required variable.
Creating a new variable
At the time of the Completed Transaction event, you must define the variable digitalData.user.criteoSegment with the value of 1 and save it permanently in the Local storage (storage in the visitor’s browser).
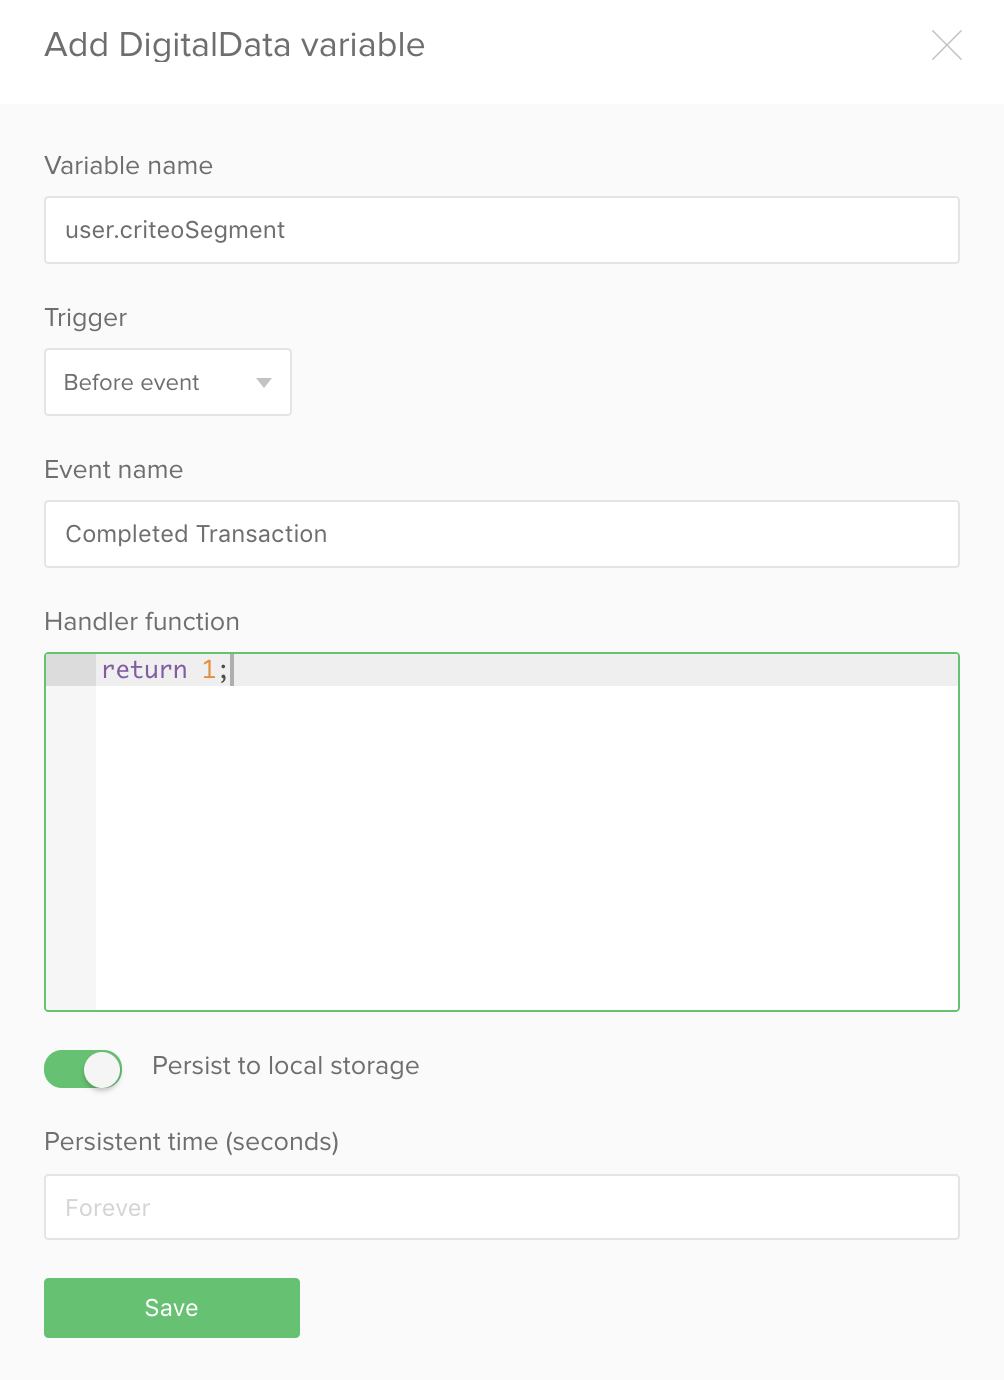
Next, in the Criteo integration settings, specify the name of the variable in which the user segment is stored - digitalData.user.criteoSegment.
Trigger types
There are two settings in the trigger settings of the variable creation tool:
- The first setting lets you specify whether the variable will be added/updated before or after the event.
- The event name is specified in the second setting.
If you select ‘before’ in the first setting, you will be able to send a value from the generated variable along with the event specified in the second setting. If you select ‘after’, the variable will be created after the event and the information will not be sent along with event.
Saving a variable
Depending on the settings, the variables will be created each time the trigger event is sent to the ‘digitalData.events’ array, or they are extracted from the local storage of the user’s device. The storage period (in seconds) of a variable can be specified in the settings.
Advice. It is sometimes necessary to save a variable not for a certain time, but until the occurrence of a certain event. In this case, you will need to create 2 variables
Example: You must pass the number of product page views into google analytics before a purchase.
To solve this task, you need to increase the value of a counter by 1 each time the Viewed Product Detail event is triggered and save that value inside the digitalData.custom.viewedProductsCount variable. When the Completed Transaction triggers - you should send the variable’s value as a custom metric. After the Completed Transaction event triggers you should nullify the value of the digitalData.custom.viewedProductsCount variable.
digitalData.custom.viewedProductsCount- saving the counter value.
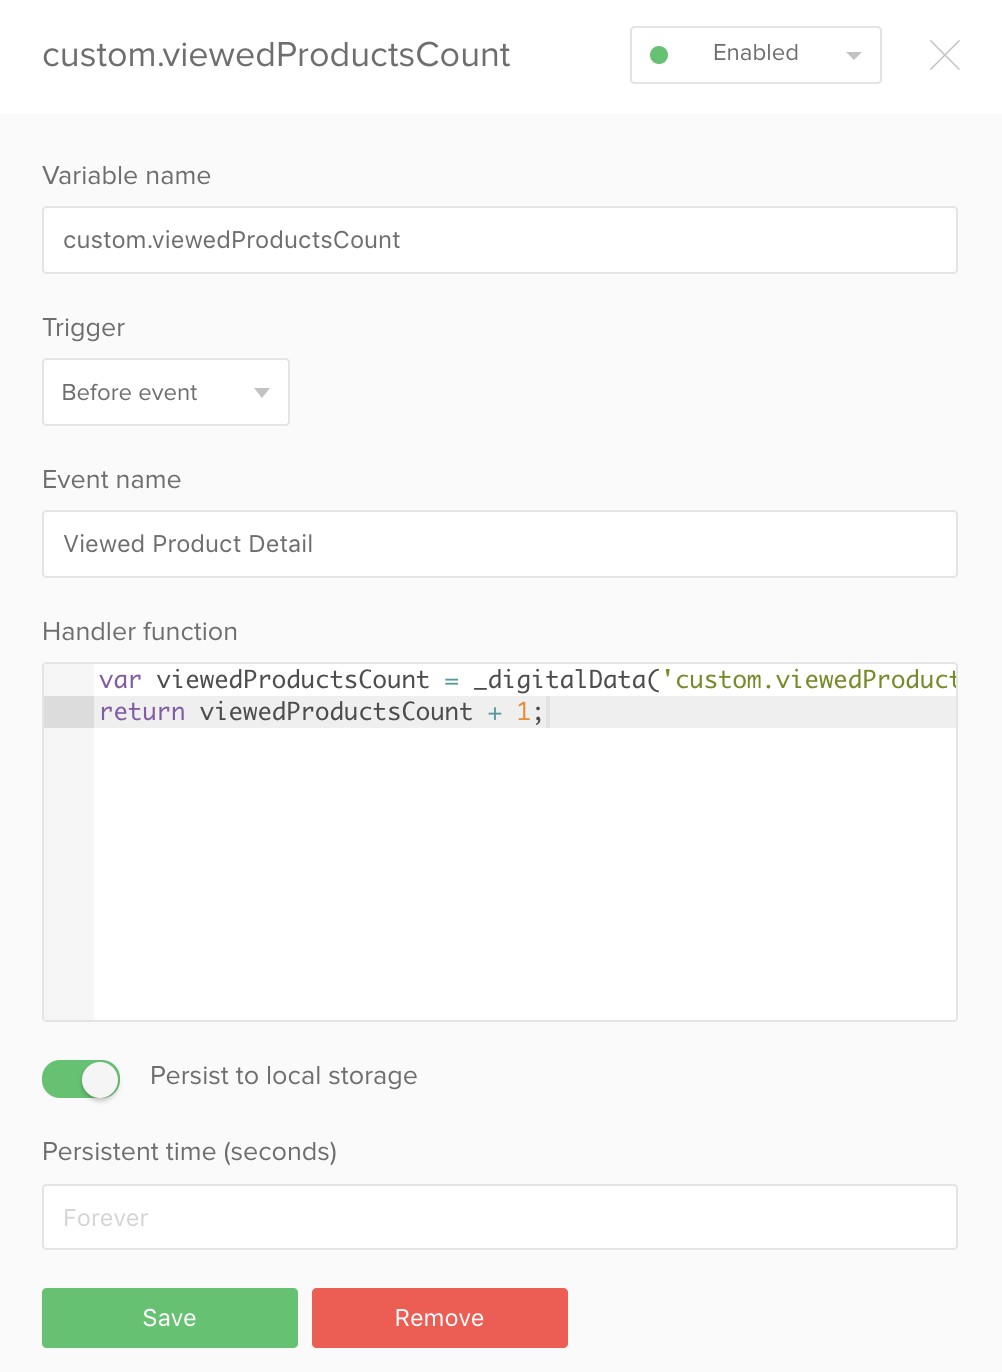
Function that returns the variable value
  var viewedProductsCount = _digitalData('custom.viewedProductsCount') || 0;
  return (viewedProductsCount + 1);
digitalData.custom.viewedProductsCount- saving the counter value.
Function that returns the variable value
return 0;
Helper functions
When creating variables, it is useful to use a set of built-in functions that greatly simplify and shorten the code of the executed functions. The list of helper functions is described in the events page.
Variable testing
The logic for testing variables is identical to the logic for testing events and integrations:
- A new variable is always created in the “active state”. This means that if you click the Publish button, your variable will work (or not work if it was not configured correctly). You can check in advance the correctness of the variable value by going to your site in test_mode mode. After loading the page, open the console (right-click the mouse), type digitalData.
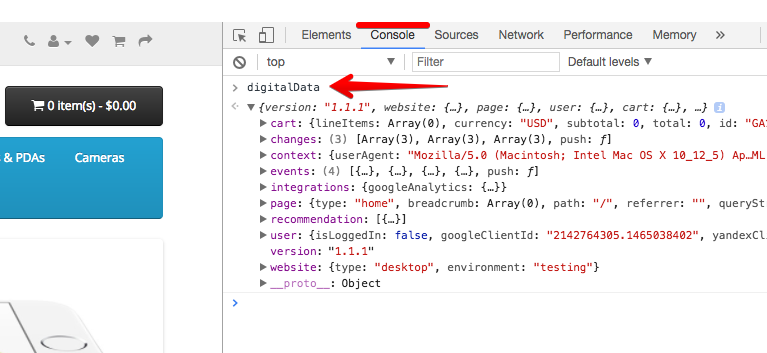
To activate test_mode you should load any page of your website with the ddm_test_mode=1 GET-parameter, for example: http://shop1.driveback.ru/?ddm_test_mode=1
- If you want to disable the variable, click the button in the upper right corner of the variable’s configuration and put it into the “Disabled” state.

- A variable can always be deleted by clicking on the “delete” button at the bottom of the variable settings panel.
Other body
This document was last updated on June 5, 2013. If you notice any gaps, outdated information or simply want to leave some feedback to help us improve our documentation, please let us know!